Overview
Having an efficient electrical power system aboard your campervan is an essential part of what that turns a van into a campervan.
For example, whether you require power for gadgets, lighting, a T.V, or to power the internal fan on a diesel night heater, having an efficient electrical system aboard your campervan is a necessity.
In this article, you will learn all the essential parts of a campervan electrical system, otherwise known as an auxiliary power system. Furthermore, this article will guide you in choosing the correct electrical equipment, as well as the best methods on how to maintain your system.
Campervan Electrical System Explained
In its most basic form, the auxiliary power system found aboard a campervan can be split into three stages.
What are the three stages of a campervan power system?
Stage 1 – Charge System

The first stage of an auxiliary power system aboard a campervan is creating the initial power. Generally, this can be achieved using three different methods. It’s also worth mentioning that all three methods can be used simultaneously.
How do I create electricity in a campervan?
The three different charge systems available for creating power aboard a campervan are as follows:
Charge System 1. Split Charge System

What is a split charge system?
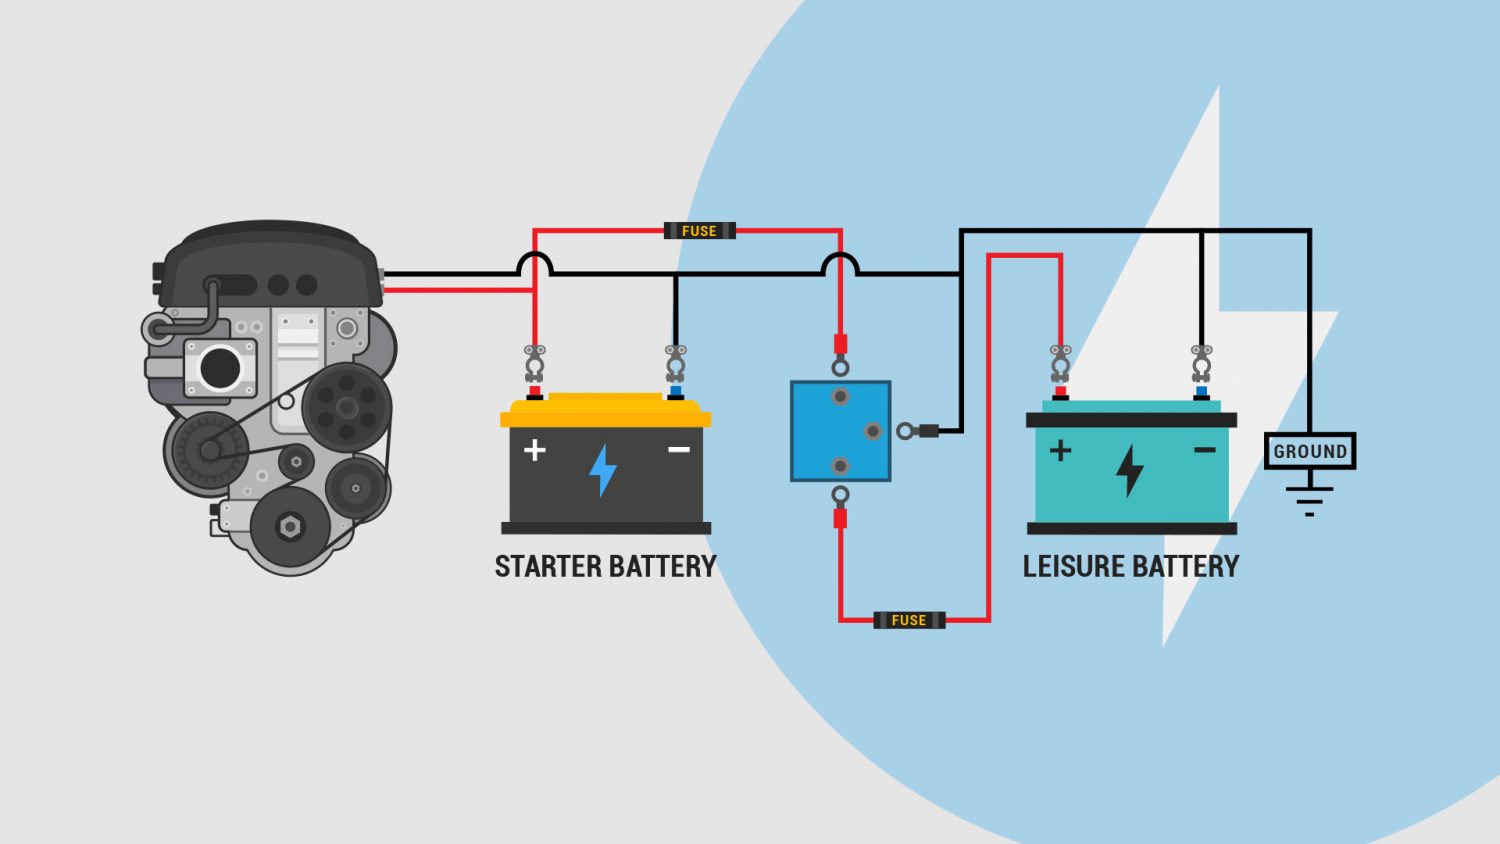
A split charge power system is an electrical system consisting of a heavy-duty power cable, terminal connectors, and a split charge device. When installed correctly, a split charge system will efficiently charge your campervans auxiliary power system from your vehicle’s primary electrical system.
How Does A Split Charge System Work?

- Primary Electrical Connection. A cable is first connected to the vehicle’s primary electrical system. This is typically done with a direct connection to the vehicles starter battery. It is worth noting that some installers prefer to connect the cable directly to the vehicles alternator
- Split Charge Device. Installed along the cable is an electrical component that acts as a switch. This is known as a split charge device, and its primary purpose is to allow power to successfully flow when the conditions are right.
- Auxiliary Battery Connection. This cable is connected directly to the auxiliary power system’s leisure battery.
Split Charge Device Types

- On-Off Switch. A manual switch is a primitive way of splitting the electrical connection between your primary and auxiliary electrical system.
- 12V Manual Relay. A 12v relay works like a manual switch, except the process is done via an electrical input (controller). Once the controller detects power, the internal contacts of the relay are pulled together creating a connection. This then allows electricity to flow from your primary electrical system (engine) to your auxiliary electrical system.
- Voltage Sensing Relay (V.S.R). Very similar to a 12V manual relay, except with the addition of one crucial feature. A voltage sensing relay intelligently monitors the incoming voltage. Once the voltage exceeds a certain level, the internal contacts connect. This then allows electricity to flow from your primary electrical system to your auxiliary electrical system.
- Charge Splitter.
- Battery-to-Battery Charger.
Why do I need a split charge system aboard my campervan?
Here are two main reasons why you would install a split charge system aboard your campervan.
1. Auxiliary Battery Charging. The first reason why would install a split charge system aboard your campervan is to charge your auxiliary battery. As your vehicle already has a primary power system that creates 12-volt power, it makes sense to connect this system to your auxiliary system. By doing so, you now have an efficient way to charge your auxiliary power system when your vehicle is operating.
2. Prevent A Flat Starter Battery. The second reason why you would install a split charge system aboard your campervan is to prevent using all the power from your vehicles primary power system. If you were to make a permanent connection from your primary electrical system to your auxiliary electrical system, you could eventually run into a problem. When the engine is off, operating onboard electronic items will draw power from both your starter and auxiliary battery. If you continue to do this over an extended period, there is a high chance you could use up all available power from both batteries. As a result, you would now have used the electricity required to start your vehicle’s engine. Consequently, you may find yourself stranded.
By Installing a split charge system aboard your campervan, this will safely provide you a safe way to split electrical power once stationary; essentially breaking the connection between your primary and auxiliary power systems. As a result, you now have an efficient method of preventing you from accidentally using all the power from your primary electrical system.
What are the advantages of a split charge system aboard a campervan?
- 12-Volt Power. As your vehicle already has a primary power system that generates 12-volt power, it then makes sense to connect your auxiliary power system into the primary system.
- Trouble-free operation. Depending on the split charge device you choose, power will only flow under the right conditions. As a result, you’ll never use all the power from your starter battery.
- Easy to install. If you can wire a plug, the chances are you can install a split charge system.
- Low cost. A typical campervan split charge kit on Amazon can be purchased for around £70.00 ($85.00 U.S.)
What are the disadvantages of a split charge system aboard a campervan?
- The Engine Has To Be Running. For your split charge system to charge your auxiliary power system successfully, your engine has to be running. This could become an issue when parked up at a campsite.
- Not The Most Efficient Way Of Charging Your Auxiliary Battery. With advancements in charge technology, alternative products are now available which will charge an auxiliary battery more efficiently than a standard split-charge device.
Conclusion
Installing a campervan split charge system is the ‘go-to’ method for the majority of campervan conversion builds. Depending on the device, a split charge relay device itself is relatively cheap, are super reliable, and the installation is straightforward.
Split Charge Products We Recommend
When it comes to installing a split charge system aboard your campervan, we suggest you go for a voltage sensing system.
Although this may be the most expensive option out of the bunch, we feel the benefits outweigh the slightly higher cost.
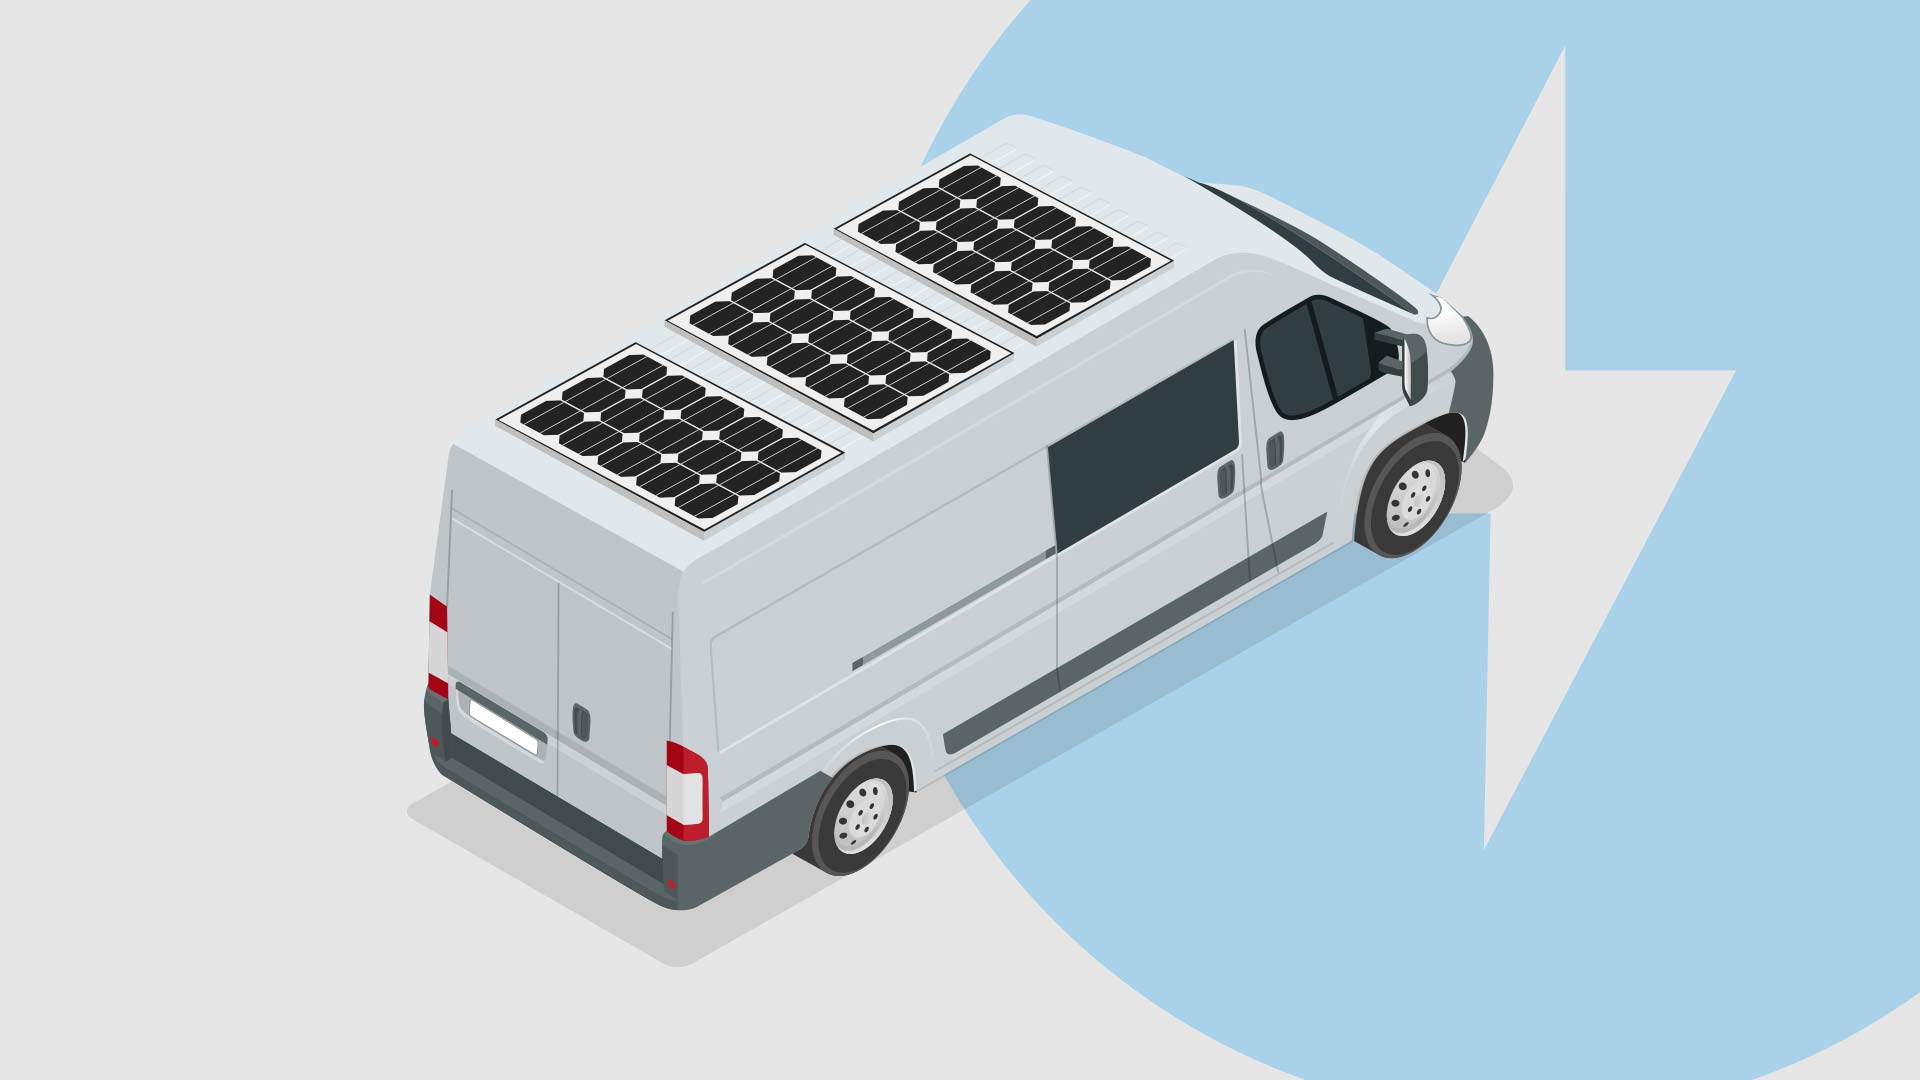
Charge System 2. Solar Power

What is a solar power system?
A solar power system is an electrical system consisting of one or more solar panels, a cable, and a charge controller. When installed correctly, a solar power system successfully creates a safe and efficient supply of electricity from the sun.
How does a solar power system work?
A solar power system is generally compromised of four main electrical components. Each component plays an essential role in a solar power system.

1. Solar Panel. The primary purpose of a solar panel is to generate electricity. This is achieved by turning particles of sunlight into electricity. The primary purpose of a solar panel is to generate electricity. This is achieved by turning particles of sunlight into electricity.
2. Solar Cable & MC-4 Connectors. The primary purpose of a solar cable is to enable the transfer of electricity created from the solar panel to additional devices and power storage components. To connect a cable to a solar panel correctly, you use an MC-4 connection terminal.
3. Solar Charge Controller. The primary purpose of a solar charge controller is to regulate the incoming voltage/current from your solar panel. This device helps prevent any potential issues that may damage your solar charge system.
4. Fuse. As you are dealing with live electricity, installing adequate protection is a must.
5. Leisure Battery. The primary purpose of a leisure battery is to efficiently store electricity created by a solar power system. This electricity can then be used later on.
Why do I need a solar power system aboard my campervan?
There are many benefits from installing a solar power system aboard your campervan. One of the main reasons is that you can generate electricity without being connected to the ‘grid’. As long as you have an adequate amount of sunlight, you technically have a way to generate an unlimited supply of electricity aboard your campervan. This means you can now stay in a stationary position for much longer without having to worry about running out of electricity.
Another great reason to install a solar power system aboard your campervan is the positive environmental benefits. As you are not connecting to a nations national electrical grid that typically uses fossil fuel, you are essentially not creating any harmful pollutants.
Advantages of a solar power system
- Free Unlimited Energy. Solar power is an excellent way of adding power to your campervan electrical system. After all, it’s basically free electricity!
- Environmentally Friendly. You’re not creating harmful emissions that are being released into the air when producing solar electricity.
- Cost-Effective. After your solar panels have been installed, operational costs are low compared to other forms of power generation.
Conclusion
Having solar power aboard your campervan is a great way to create electricity. We really like the fact that you can simply park up and have access to an endless amount of electricity (obviously this depends on the weather and time of day depending). Although the initial outlay may be a little more costly, you’ll soon recuperate those costs once you start generating electricity.
Charge System 3. Battery Charge via Shore Power

What is a shore power system?
A shore power charge system, sometimes referred to as a hook-up power system is an electrical system consisting of a mains power inlet, consumer unit/breaker panel, 110/230-volt battery charger and connecting wires.
What is a land-based power source?
Generally, land-based power is classified as mains power coming from a countries national electric grid. Depending on the county you are in, this is either 110 or 230 volts. However, it is also possible to generate land-based power using an external generator. For instance, these generators may be powered by diesel or renewable energy sources such as wind or solar.
Advantages of a shore power charge system
- Convenience. Having the option to just ‘plug-in’ your campervan to charge your onboard power source is extremely convenient.
- Guaranteed Power. As you’re connected to a countries national grid system, power is typically guaranteed night and day. And unlike solar, you do not have to worry about the weather.
- Mains Power System. Installing the additional components required to create a mains-power system (high voltage) aboard your campervan is a simple process.
How does a shore power charge system work?

- Power Inlet/Shore Power Cable. At one end, a cable is connected to a power source. At the other end, it is connected to a power inlet which is typically installed on the body of the campervan.
- Consumer Box/Breaker Panel. Once the shore power is live, electricity will flow into the power inlet where it will then travel along a cable to a consumer unit (also known as a breaker panel in the U.S.A./Canada).
- Optional Mains Power Outlet.
- Battery Charger. A 12-volt battery charger is wired into the consumer unit.
- Leisure Battery. The 12-volt battery charger is connected to the campervans auxiliary battery. When operational and receiving power from shore power, the 12-volt battery charger will now safely recharge your leisure battery.
Products We Recommend
Stage 2 – Power Storage System / Leisure Battery

Now you have a way to produce power in your campervan, you’ll inevitably need a method to store all this power. For this, you use a leisure battery.
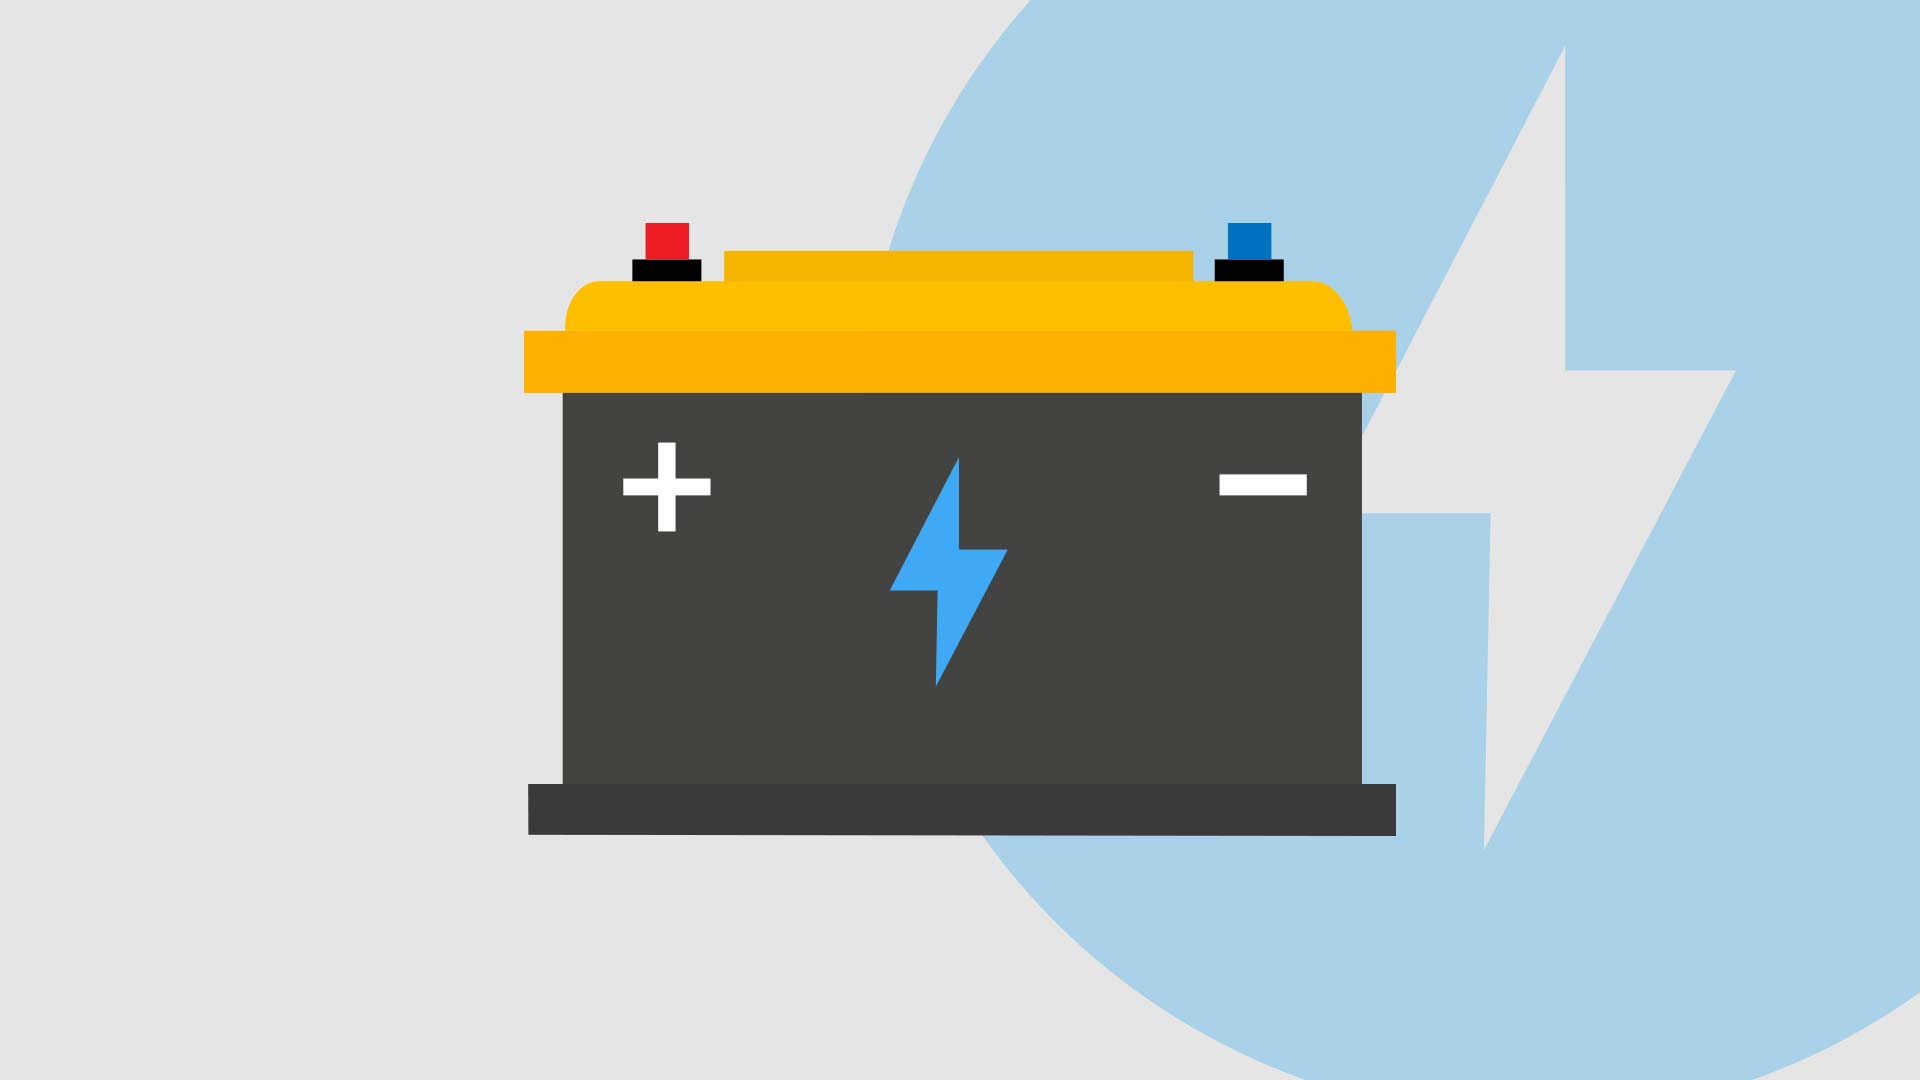
What is a leisure battery?
A leisure battery, also known as an auxiliary battery, deep cycle battery or a secondary battery, is a type of battery used to power appliances and equipment in a campervan or motorhome when the engine is turned off or when the vehicle is not connected to an external power source (shore power).
In a campervan, the leisure battery is usually separate from the vehicle’s main battery, which is used to start the engine. The leisure battery is designed to provide a steady and reliable source of power to run appliances such as lights, fridge, water pump, and other electrical devices in the living area of the vehicle.
What is the difference between a starter battery (the one used to start my van engine), and a leisure battery?
A starter battery, also known as a cranking battery, is designed to provide a high burst of power for a short period to start the engine of a vehicle. The starter battery delivers a high current to turn the engine over and get it running, and once the engine is started, the battery is recharged by the vehicle’s alternator. Starter batteries are usually designed with thinner plates and a higher surface area to deliver high currents quickly, but they have a lower capacity than leisure batteries.
On the other hand, a leisure battery is designed to deliver a steady and reliable source of power over an extended period to run electrical appliances and devices in a campervan or motorhome when the engine is not running. Leisure batteries have thicker plates and a lower surface area, which allows them to deliver a lower current over a longer period. They have a higher capacity than starter batteries, which enables them to provide power for an extended period without being recharged.
Different Leisure Battery Technologies
There are several types of leisure batteries available in the market, and each type has its own unique characteristics and advantages. The main types of leisure batteries are:
- Flooded lead-acid batteries: These are the most common and affordable type of leisure battery. They are reliable and offer good performance, but they require regular maintenance, such as checking and topping up the electrolyte levels.
- Gel batteries: Gel batteries are sealed and maintenance-free, which makes them a popular choice for campervan owners. They are more expensive than flooded batteries, but they offer a longer service life and can withstand deep discharges.
- Absorbent Glass Mat (AGM) batteries: AGM batteries are sealed and maintenance-free, like gel batteries. They have a higher capacity than gel batteries and can deliver more power. They are also more expensive than flooded batteries and require a specific charging profile.
- Lithium-ion batteries: Lithium-ion batteries are a relatively new technology, but they have gained popularity among campervan owners due to their high energy density, long service life, and fast charging. They are also lightweight and require no maintenance. However, they are more expensive than other types of leisure batteries.
What is Ah, or amp-hours on a leisure battery?
Ah stands for Ampere-hour, which is a unit of measurement used to describe the capacity of a battery. It represents the amount of charge that a battery can deliver in one hour.
For example, a battery with a capacity of 100 Ah can theoretically deliver a current of 1 ampere for 100 hours or 10 amperes for 10 hours before it is completely discharged. The actual runtime of the battery will depend on various factors, such as the load applied, temperature, and age of the battery.
Ah is an important specification to consider when selecting a battery for a particular application. It helps to determine how long the battery will last before it needs to be recharged or replaced. The higher the Ah rating of a battery, the more capacity it has and the longer it can power a device or appliance.
Conclusion
In conclusion, a leisure battery is an essential component of a campervan or motorhome, providing a steady and reliable source of power for electrical appliances and devices when the engine is not running. There are several types of leisure batteries available in the market, each with its own unique characteristics and advantages.
When choosing a leisure battery for your campervan, consider factors such as the size and capacity you need, the type of appliances you will be powering, and your budget. It is also important to choose a battery that is compatible with your charging system and charging profile. With the right leisure battery, you can enjoy a comfortable and convenient camping experience, wherever your travels may take you.
Leisure Batteries We Recommend
Stage 3 – Power Supply System

Now you know how to safely create and store power aboard your campervan, all that’s left is to distribute the power safely around your campervan to each individual appliance. However, here’s where it may get a little confusing.
Depending on the voltage of the appliances you intend to operate, you may want to install either a 12-volt system, a mains voltage system, or both.
Campervan Electrical System Number 1: 12 Volt System (Low Power)

What is a 12 volt electric supply system aboard a campervan?
A 12-volt electric supply system is a network of low-voltage power components that works independently from your campervans native electrical system. This power supply system is installed in the majority of campervan conversions.
Why would you use a 12-volt power system in a campervan?
- Availability of 12-volt appliances. The nominal onboard voltage aboard your campervan is 12-volts D.C. Items such as the horn, lights, E.C.U and stereo all run of a 12 volt supply. Furthermore, there are millions of vehicles around the planet, all running on a 12-volt system. Therefore, it makes economic sense for manufactures to develop appliances just for this voltage. As a result, there is a large choice of electrical accessories that run specifically on 12-volts.
- Your vehicle has a native 12-volt system already in place. As your campervan has a native 12-volt system onboard, creating an additional 12-volt campervan electrical system to power all 12-volt appliances is a relatively simple process.
- 12 volts is safe. Generally, electricity lower than 50 volts is classified as safe for human contact. Conversely, we must stress: Always be cautious when working with any type of live electrical equipment. Always wear appropriate protective equipment.
How do you connect your appliances to a 12v power system?
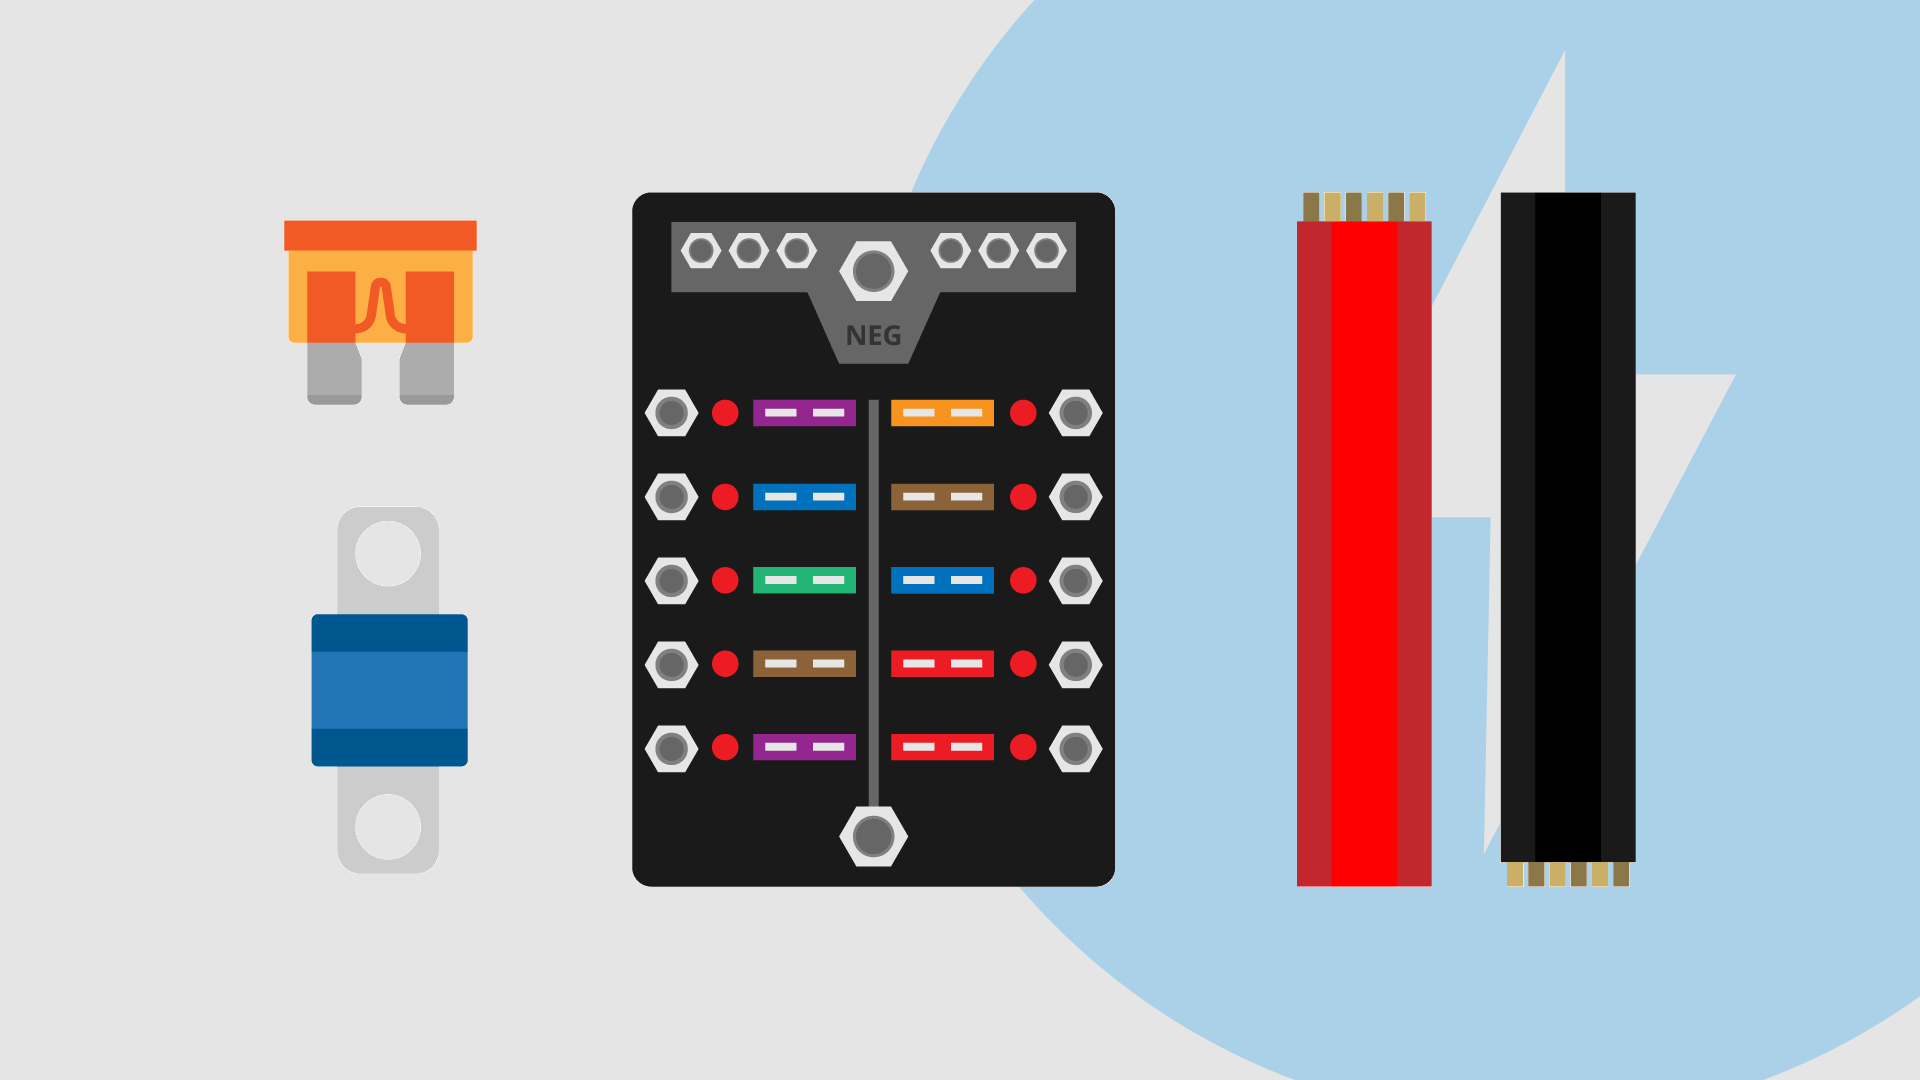
To connect your appliances to your power system you would install a fuse box. Therefore, a fuse box is a brilliant way of adding multiple 12-volt connection points.

Simply connect a positive and a negative cable from your leisure battery to the corresponding terminals on your fuse box.

If your fuse box does not come with an integrated negative connection block, simply install a separate negative bar with multiple terminals. These are known as a bus-bar.
Campervan Electrical System Number 2: Mains Power

What is mains power?
Mains power is a counties national nominal domestic voltage. This is the voltage that is typically delivered to a domestic property (house) via the national grid (power grid, hydro). In the majority of countries around the planet, this is either 110, 120, 230 or 240 volts A.C.
What is a mains power electrical supply system aboard a campervan?
A mains power electrical supply system is a network of high-voltage power cables and connected components that works independently from your campervans native low power (12v) electrical system.
What is a campervan mains power electrical supply system used for?
A mains power electrical supply system is used to power high-voltage appliances. For example, items such as hair irons, hairdryers, microwaves and T.V’s all operate on a high-voltage power system.
Do I need to install a mains power electrical supply system aboard my campervan?
You should only install a mains power electrical supply system aboard your campervan if you intend on operating high-voltage appliances.
Advantages of a mains power electrical supply system aboard a campervan
- Run High-Voltage Appliances.
- Constant High-Voltage Power Supply. Installing shore power aboard your campervan gives you the ability to power your campervan for an indefinite period.
- Charge Leisure Battery. By installing a mains-powered battery charger, you can simultaneously run high voltage power while charging your leisure battery.
How do I generate mains power electricity aboard a campervan?
Creating an efficient mains power electricity aboard your campervan is typically achieved using one of two methods.

Method 1: Power Inverter
What is a power inverter?
A power inverter changes direct current (DC) power (usually 12V or 24V) into conventional mains alternating current (AC) power (usually 110V or 230V).
How does a power inverter work aboard a campervan?
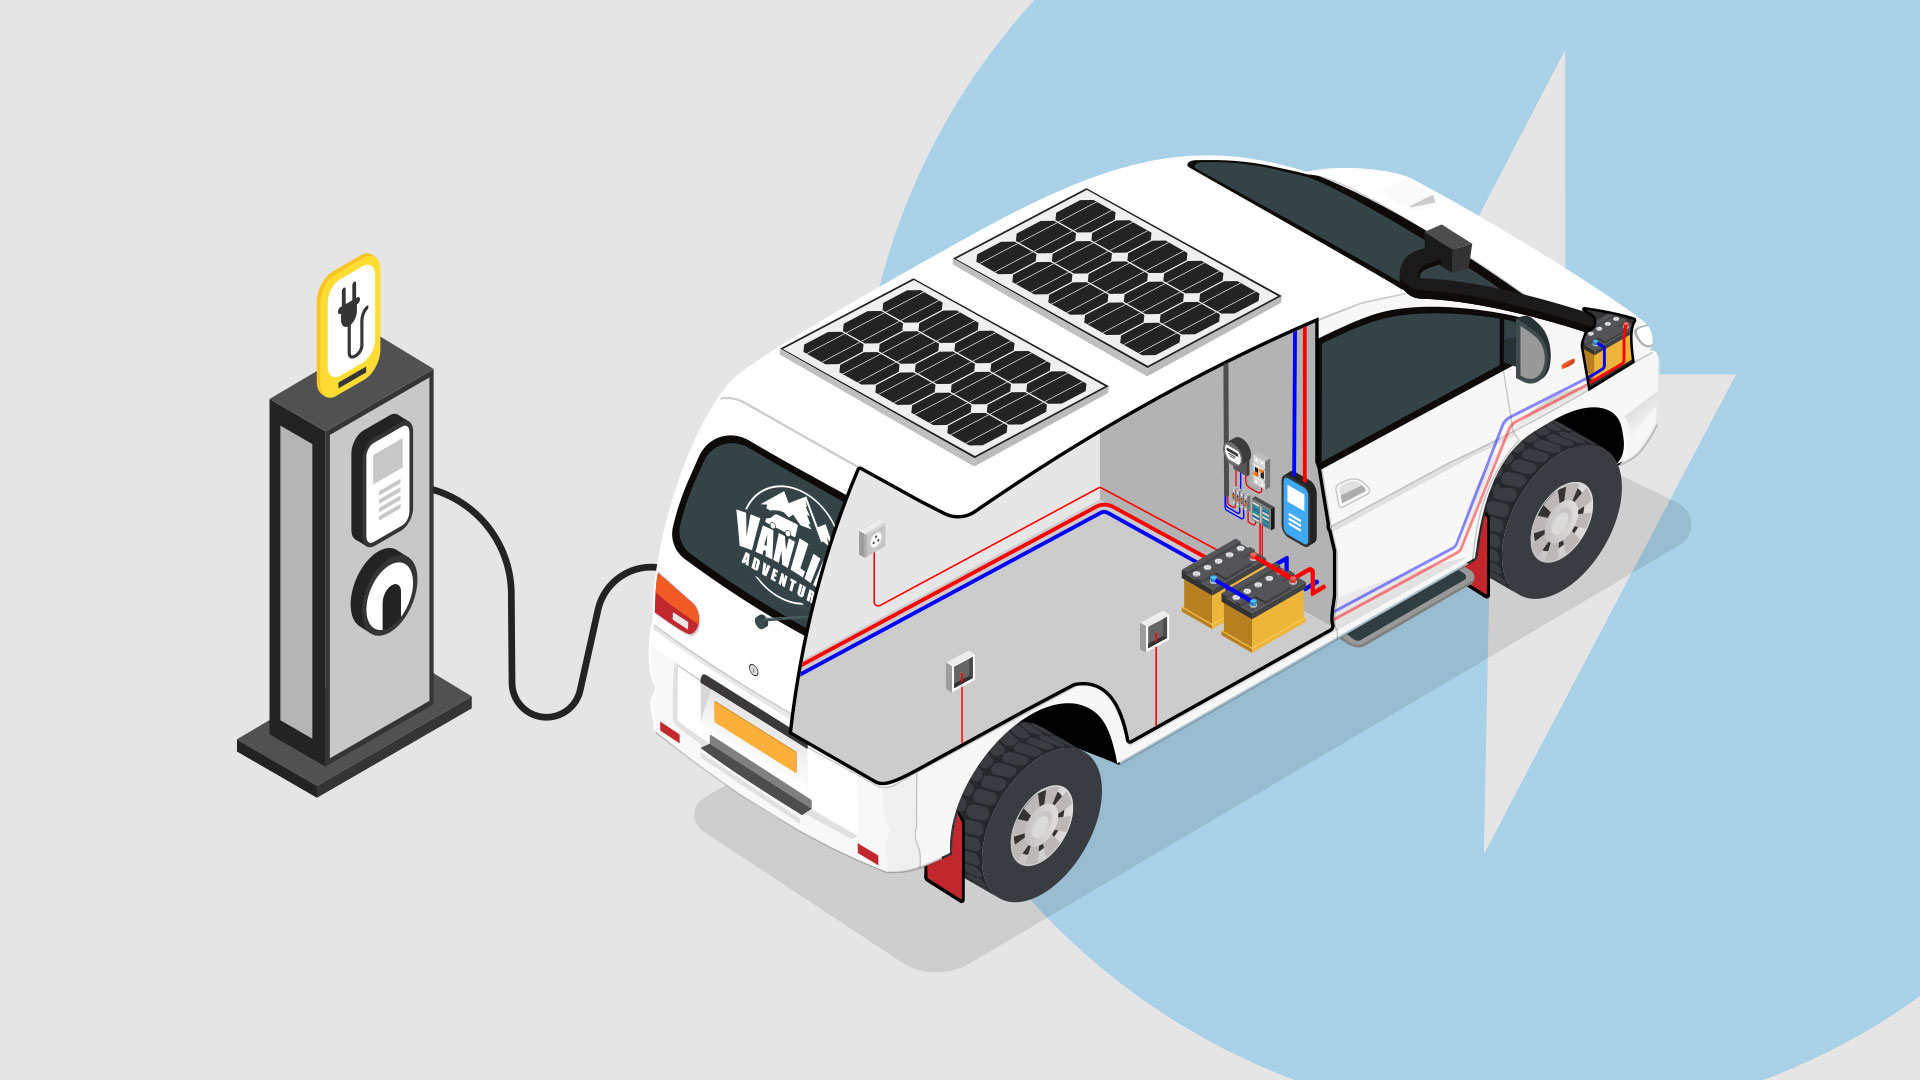
The power inputs on the inverter are typically connected directly to the campervans leisure battery.
The power outlet of the inverter are connected into a consumer unit. From here, socket outlets are installed in a convenient location aboard your campervan.
Mains power system via a power inverter diagram

Here is a super simple mains power wiring diagram you would find aboard a campervan.
- 12 volt D.C. to 110/230 volt AC Power Inverter
- Consumer Unit/Breaker Box
- Mains Power Socket Outlet
- Leisure Battery
Conclusion
Using a power inverter to generate mains power aboard your campervan is ideal for travellers who like to remain off-grid as much as possible. An inverter system is reliable, relatively inexpensive, and will power a good selection of appliances for a reasonable length of time.
However, as your power inverter operates directly of your leisure battery, you will have to monitor your leisure battery charge level.
Products We Recommend

Method 2: Shore Connection
What is a shore connection?
A hook-up connection is a method of directly connecting to a land-based power source via a power inlet that is typically installed on the side of your campervan.
How does a shore connection work?
You first connect a specially developed cable from a power inlet fitted on your campervan to a power connection point. These are sometimes referred to as power bollards. From here, electricity travels along your connection wire, then into your campervan, where it will finally come to a connected breaker box.
Once the power successfully passes through the breaker box, electricity then travels along another wire where it will come to its final destination, a power outlet.
Advantages of a shore connection
- Unlimited Power. Providing that the electricity supply is reliable, you will have an endless amount of high-voltage power.
- Plug-In & Relax. Travelling on the road can sometimes be hard. Knowing you can simply plug in your van for power can be a significant relief. Once plugged in, you can simply forget and enjoy your time.
Disadvantages of a shore connection
- Remaining in a Fixed Location. You have to remain in a static location while connected to a land-based power source.
- Additional Equipment. You will have to purchase an additional connection wire with the correct adaptor that is used to connect to a shore connection point/power bollard.
Mains power via shore connection diagram

Here is a simple wiring diagram of a mains power system via a hook-up connection that you would find aboard a campervan.
- Power Inlet
- Consumer Unit/Breaker Box
- Mains Power Socket Outlet
Conclusion
Can I install both a shore power system and a power inverter?

Yes, you can install both a hook-up power system and a power inverter. To do this, you would have to install a 2-pole switch that allows you to select the appropriate incoming 110/230v power source.
- When connected to shore power: Switch to hook-up power.
- When off-grid: Switch to your onboard power inverter.
Complete Campervan Wiring Diagram

Here’s a complete wiring diagram for a campervan. Everything you need for an efficient system. All of the links will take you to the products we recommend.
[su_accordion][su_spoiler title=”Split Charge System – (1-3/GREEN)” open=”no” style=”fancy” icon=”plus” anchor=””] 1. Engine (Alternator Power) This is where the power will come from for your split charge system. 2. Split Charge Relay We believe the best split charge relay you can choose which is more than capable for most applications is a voltage sensing relay (V.S.R.). Make sure to read out our full article where we cover all different split charge methods available for a campervan. 3. Breaker Switch Fitting a breaker switch in your system here will give you the option to completely isolate the split charge system. This is a great additional safety feature. [/su_spoiler] [su_spoiler title=”Solar Charge System – (4-7/BLUE)” open=”no” style=”fancy” icon=”plus” anchor=””] 4. Solar Panel 5. Solar Charge Controller 6. MC-4 Connectors 7. Breaker Switch Fitting a breaker switch here gives you the option to completely isolate the solar charge system. This is a great additional safety feature. [/su_spoiler] [su_spoiler title=”Mains Charge System – (8-9/RED)” open=”no” style=”fancy” icon=”plus” anchor=””] 8. Mains Power Inlet 9. 2-Pole Changeover Switch Use this switch to change power input from inlet to inverter. [/su_spoiler][su_spoiler title=”Power Storage System (10-14/GREY)” open=”no” style=”fancy” icon=”plus” anchor=””] 10. Leisure Battery Read our full article on leisure batteries. 11. Common Bus Bar (Positive) A bus bar is a great way of keeping your install clean and simple. Make sure you buy a bus bar that is rated for your system. 12. Common Bus Bar (Negative) 13. Inline Fuse